



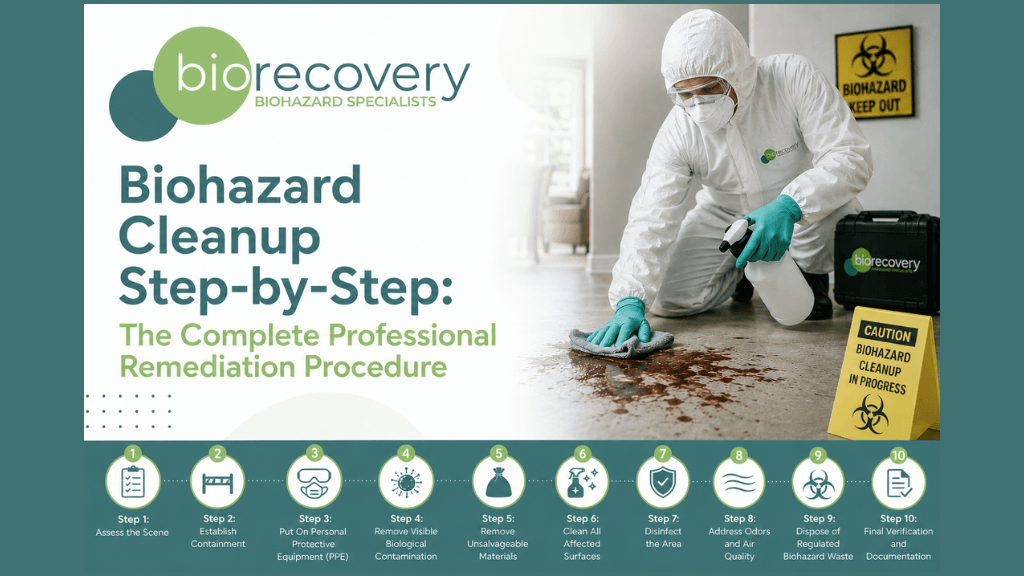
The biohazard cleanup process follows a structured series of steps that typically include scene assessment, containment, personal protective equipment (PPE), removal of contaminated materials, cleaning, disinfection, odor remediation, regulated waste disposal, and final verification. These procedures help reduce exposure risks and restore affected areas following biological contamination.
Whether the contamination involves blood, bodily fluids, decomposition, or other potentially hazardous materials, follow a professional biohazard cleanup step-by-step process designed to prioritize safety and thorough decontamination.
What Is Biohazard Cleanup?
Biohazard cleanup is the process of safely removing, cleaning, disinfecting, and disposing of biological contaminants that may pose health risks.
Examples include:
- Blood cleanup
- Trauma scene remediation
- Crime scene cleanup
- Unattended death cleanup
- Decomposition cleanup
- Infectious disease contamination
- Hoarding situations involving biological waste
Unlike routine cleaning, biohazard remediation often requires specialized equipment, PPE, containment procedures, and regulated waste disposal.
For a broader overview of how remediation projects are managed, see our guide to the biohazard cleanup process.
Biohazard Cleanup Step-by-Step
Step 1: Assess the Scene
Every remediation project begins with a thorough evaluation of the affected area.
Technicians identify:
- Sources of contamination
- Affected materials
- Potential exposure risks
- Structural damage
- Areas requiring containment
The purpose of the assessment is to determine the scope of remediation and establish an appropriate cleanup plan.
What Technicians Look For
- Visible contamination
- Hidden contamination
- Porous materials
- Air quality concerns
- Cross-contamination risks
A proper assessment often determines the success of the entire cleanup process.
Step 2: Establish Containment
Before any cleanup begins, contaminated areas are isolated.
Containment helps prevent biological materials from spreading to unaffected portions of the property.
Containment measures may include:
- Physical barriers
- Plastic sheeting
- Restricted access zones
- Controlled work areas
Why Containment Matters
Without containment, contaminants can spread through:
- Foot traffic
- Equipment movement
- Airflow
- Material removal activities
Preventing cross-contamination is one of the most important objectives during remediation.
Step 3: Put On Personal Protective Equipment (PPE)
Before entering contaminated areas, technicians wear appropriate PPE.
Depending on the situation, PPE may include:
- Disposable gloves
- Protective coveralls
- Eye protection
- Face shields
- Respirators
- Shoe covers
Proper PPE helps reduce exposure to biological hazards.
Professional remediation teams often follow established OSHA biohazard cleanup guidelines regarding worker safety and exposure prevention.
Step 4: Remove Visible Biological Contamination
The next step involves removing visible contamination from affected areas.
Examples include:
- Blood
- Bodily fluids
- Biological residue
- Tissue contamination
Technicians use specialized cleaning methods and equipment to safely collect contaminated materials while minimizing the risk of spread.
Goal of This Step
- Eliminate visible contamination
- Reduce biological load
- Prepare surfaces for deeper cleaning and disinfection
Step 5: Remove Unsalvageable Materials
Not every material can be restored.
Porous materials may absorb biological contaminants and require removal.
Common examples include:
- Carpet
- Carpet padding
- Drywall
- Upholstered furniture
- Insulation
- Ceiling materials
When Removal Is Necessary
Removal is often required when contamination has:
- Penetrated deeply into materials
- Reached structural components
- Created persistent odor issues
Proper removal helps ensure contamination is not left behind.
Step 6: Clean All Affected Surfaces
After contaminated materials are removed, surfaces are thoroughly cleaned.
Cleaning removes:
- Dirt
- Residue
- Organic matter
- Remaining contaminants
This step prepares surfaces for disinfection.
Why Cleaning Comes Before Disinfection
Disinfectants perform more effectively when visible contamination and residue have already been removed.
Skipping this step can reduce the effectiveness of later treatment.
Step 7: Disinfect the Area
Disinfection is one of the most critical stages of biohazard remediation.
Technicians apply appropriate disinfectants to affected surfaces according to manufacturer instructions.
Key considerations include:
- Proper application
- Surface coverage
- Required contact times
- Treatment of adjacent areas
Many of the same principles are discussed in our guide on how to disinfect blood safely.
Step 8: Address Odors and Air Quality
Some biohazard situations create strong odors that require specialized treatment.
Examples include:
- Decomposition cleanup
- Trauma scenes
- Hoarding conditions
Odor remediation may involve:
- Deep cleaning
- Source removal
- Air treatment methods
- Surface treatment procedures
The objective is to eliminate odors at their source rather than mask them temporarily.
Step 9: Dispose of Regulated Biohazard Waste
Materials removed during remediation must be handled and disposed of properly.
Examples include:
- Contaminated PPE
- Blood-soaked materials
- Disposable cleaning supplies
- Biohazard waste
Waste disposal follows applicable regulations and industry procedures.
Why Proper Disposal Matters
Improper disposal may create:
- Health risks
- Environmental concerns
- Regulatory issues
Proper handling helps ensure contaminated materials are safely managed.
Step 10: Final Verification and Documentation
The final step is confirming that remediation objectives have been completed.
Technicians inspect the work area and verify:
- Contamination has been removed
- Cleaning procedures were completed
- Disinfection was performed
- The property is ready for restoration or occupancy
Documentation may also be generated for insurance or property records.
Common Mistakes During Biohazard Cleanup
Skipping PPE
Failure to wear protective equipment increases exposure risks.
Using Household Cleaners Alone
Routine cleaning products may not be sufficient for biological contamination.
Ignoring Hidden Contamination
Blood and bodily fluids can migrate beneath flooring, walls, and porous materials.
Improper Waste Disposal
Contaminated materials require specialized handling and disposal procedures.
Inadequate Disinfection
Disinfectants must be used according to label instructions and contact-time requirements.
Why DIY Biohazard Cleanup Can Be Dangerous
Many biological hazards are not immediately visible.
Potential risks include:
- Bloodborne pathogens
- Bacterial contamination
- Airborne particles
- Hidden contamination
- Cross-contamination
Understanding the dangers of biohazard exposure can help property owners make informed decisions regarding remediation.
When Should You Hire a Professional?
Professional remediation is often recommended for:
- Crime scenes
- Trauma scenes
- Unattended deaths
- Significant blood contamination
- Decomposition cleanup
- Hoarding situations involving biological waste
The complexity of remediation often depends on contamination severity and structural impact.
How Much Does Biohazard Cleanup Cost?
The extent of contamination, material removal requirements, and waste disposal needs can significantly affect project costs.
For detailed pricing information, see:
- biohazard cleanup cost
- crime scene cleanup cost
- unattended death cleanup cost
Frequently Asked Questions
What are the steps in biohazard cleanup?
The typical steps include assessment, containment, PPE, contamination removal, material removal, cleaning, disinfection, odor treatment, waste disposal, and final verification.
Why is containment important during biohazard cleanup?
Containment helps prevent contaminants from spreading to unaffected portions of the property during remediation.
Why are contaminated materials sometimes removed?
Porous materials may absorb biological contaminants and cannot always be safely restored through cleaning alone.
How does professional biohazard cleanup differ from standard cleaning?
Professional remediation involves specialized procedures, PPE, containment methods, disinfectants, and regulated waste disposal practices.
Can homeowners perform biohazard cleanup themselves?
Small incidents may be manageable, but significant contamination often requires professional remediation due to safety concerns and contamination risks.
What happens after cleanup is complete?
Technicians perform a final inspection, verify remediation objectives, and prepare the property for restoration or occupancy.
Key Takeaways
- Biohazard cleanup follows a structured step-by-step remediation procedure.
- Proper assessment, containment, PPE, cleaning, disinfection, and waste disposal are essential components of the process.
- Hidden contamination and biological hazards may remain even after visible materials are removed.
- Professional remediation helps reduce exposure risks and restore safe conditions.
- Understanding each step provides insight into how contamination is managed and remediated.